


The Art of Bread Making
Local bakers share their tips for making loaves you’ll love
The transition from Wisconsin’s hot, humid summer to its cool, orange fall brings preparation for the season of giving. With fall comes many gatherings centered around the sharing of food, drinks and good times. Bread making is a hobby that reveals itself openly during these feastful family events.
Making bread is part science, part art. In addition to its surprisingly scientific procedure, creativity from the baker is needed to develop unique recipes. The process of bread making dates back to around 8000 B.C. in the Middle East, specifically Egypt, where bakers crushed grains to produce what resembled modern day tortillas. Since its origins, bread making has always shown to be a community event.
“Everyone used to bake before it was so convenient. Even in countries that are not as developed, people don’t have ovens in their homes, so it’s this huge community thing where people will make their dough at home,” says Jen Kronberg, pastry chef at Fress Restaurant and Bar in Appleton. “But, everyone goes down to the baker who has this huge stone oven that’s fired up all day and everyone from town walks down there, throws their bread in, and then gets to take it home.”
Kronberg mostly bakes bread at home, but makes a Mediterranean focaccia for Fress’s charcuterie and cheese boards, as well as a mussel dish.

Mussels from Fress
When reading the steps of how to make bread, you might think of science experiments filled with trial and error. The process begins with gathering and mixing the ingredients: as simple as water, flour and yeast. The temperature of the water is important in ensuring the dough turns out well. Typically water should be around 100 and 110 degrees.
“If it’s colder than that you’re not going to activate your yeast, but if it’s too hot, you’re going to kill your yeast,” Kronberg says. “I add just a little pinch of sugar because it helps to get the yeast even more activated.”
Once the ingredients are mixed, kneading the dough helps develop a healthy gluten network to strengthen it. After being kneaded for the amount of time that the recipe calls for, the dough is ready for its bulk ferment. In this step, the dough rests so nature can take the wheel to cause the yeast to feed on the sugar and starches in the dough, producing carbon dioxide which makes the dough rise to develop texture and flavor in the finished bread. Keeping the dough chilled can help this process.
“I don’t want the yeast to feed on the sugars way too fast and then die. So, I keep my dough in the cooler so that they can ferment overnight and slowly feed on all the sugar and develop a nicer flavor,” says Carlos Araujo, baker at Mad Apple Burger and Billiard Co. in Appleton.
Mad Apple scratch-makes all of their bread, cookie and pie dough. They make pretzel buns, brioche burger buns, ciabatta buns, flatbread and hearty white bread. The recipes come from Araujo’s previous baking experiences in Los Angeles.
Once the dough is fermented, it can be shaped into loaves or whatever form you prefer. After shaping, the dough is proofed – it’s given a second chance to rise, typically doubling in size. Most bakers proof their dough by putting it in baskets in the shape of the loaves and putting the baskets in plastic bags to prevent oxygen from entering. The baskets are then put into the fridge to prevent the proof from occurring too quickly, which would cause the dough to over proof and collapse when baking.

Voyagers country loaf
After the dough is proofed, it’s now ready to bake. It’s recommended to bake your bread in a convection oven so that the air is fanned equally around the bread for more consistent results. Using cast iron pans helps the bread get the perfect amount of steam, basically turning a home oven into a commercial oven. Araujo prefers to use stones in his oven to produce steam when baking bread.
“I like using our pizza oven because it has pizza stones on it, so I just put the trays in there, and then toss some water on it, and close the oven door right away so that it can build some steam,” Araujo says. “That’s pretty much how you can do it at home, too. You can buy a pizza stone or lava stones. It helps you get that nice crust on your bread.”
Although the process of bread making mostly follows step-by-step, scientific instructions, creativity becomes a big part of it as the baking environment changes. The temperature of your kitchen can change how long you should knead, ferment, proof and bake your dough. Most bakers say the biggest trick to bread making is adapting to the environment you’re baking in. On more humid days, you may spend less time kneading, fermenting, proofing or baking than on dryer, cooler days. The art of bread making can also include the added ingredients (such as pumpkin, cranberries or walnuts), the shape of your loaves and the scoring design imprinted on the dough before baking.
“Different kinds of bread call for different styles. You might see decorative loaves with different things cut into them, so making even little slashes into baguettes takes time to get right,” says Cael Neary, baker for Stuc’s Pizza with locations in Appleton and Neenah. Stuc’s serves their sandwiches on house-made Italian Como bread as well as baguettes. “If you don’t get them at the right depth or the right angle, it can cause the bread to blow out on the sides or be warped in a funny way.”
For beginners looking to try their hand at making their own bread, YouTube, Pinterest and Instagram offer helpful tutorials and tips. Patience and persistence are also key.
“If somebody were to make bread for the first time, my main recommendation would be to make the same recipe two or three times to the point that you feel pretty good about it before you make something new because it takes that repetition of getting a feel for things in order to know what’s working and what’s not,” says Kevin McGillivray, owner and baker of Voyageurs Sourdough in Green Bay. The online and home delivery bakery opened in September 2018.
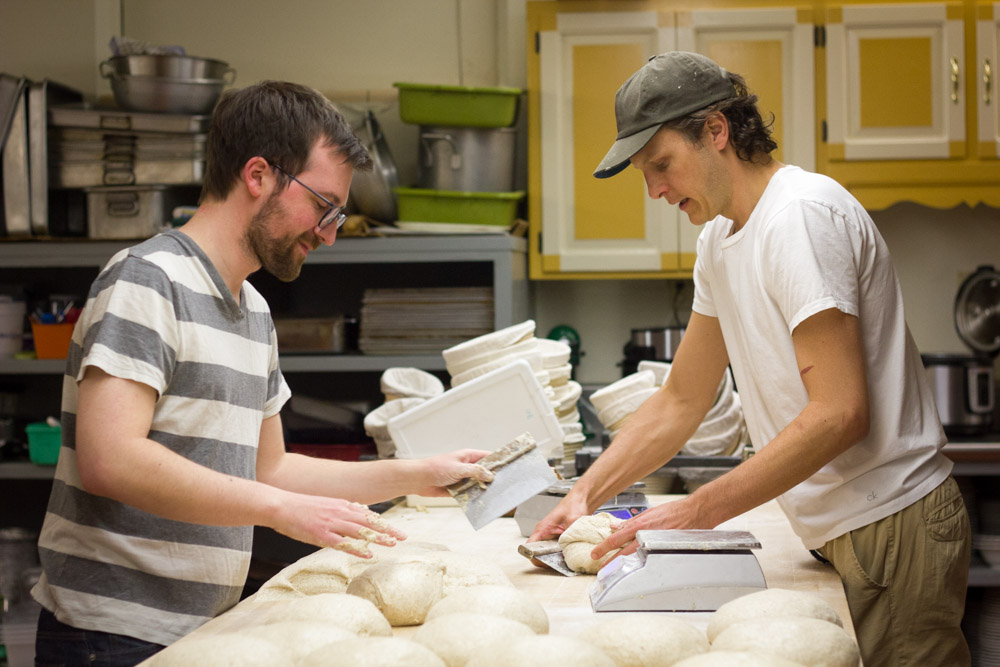
McGillivray (left) with Voyagers Sourdough cofounder Ben Cadman.
Voyageurs Sourdough specializes in its namesake. Sourdough is a bread that bakers consider difficult to make because it’s time consuming since it is made with wild yeast. Voyageurs’s sourdough typically takes anywhere from 18 to 24 hours to make. They sell their loaves to individuals in addition to several Green Bay-area restaurants including Hinterland Brewery, Ledgewood Vineyard and Tenent Restaurant. Because of the commitment it takes, many restaurants order their bread from bakeries around the Valley. Popular bakeries that service restaurants include Manderfield’s Bakery, Simple Simon Bakery, Great Harvest Bread Co. and Breadsmith.
As with any art, practice makes perfect. Bread making is no different. For those looking to dabble, Neary suggests trying a simple recipe and let science do the work before trying more complicated methods of shaping or scoring.
“Be patient in knowing that your first few batches of bread probably won’t turn out exactly how you want them,” Neary says. “I know my first loaf I ever made at home was a rock. It was inedible, it was so bad. The next time I did it, it was better, and the time after that it was edible.”
Mediterranean Focaccia
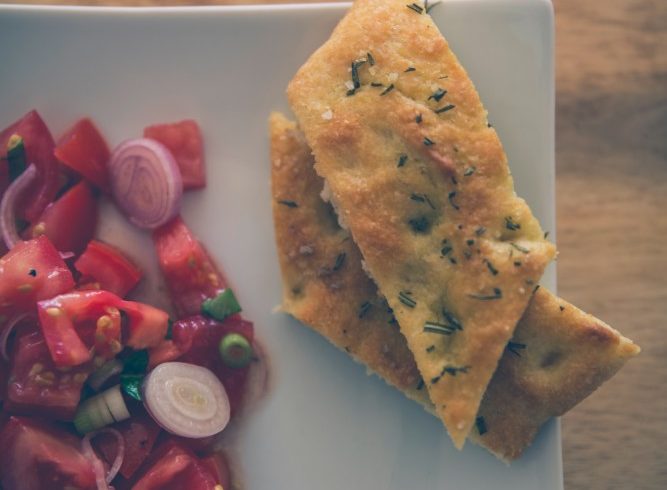
Courtesy of Jen Kronberg, Fress Restaurant and Bar in Appleton
2 c warm water, approximately 100-110 degrees F
1 T dry active yeast
1 t sugar
2 T olive oil + more for bowl and brushing
1 T kosher salt
4-5 c all purpose flour
Any chopped or dried herb of your choosing (rosemary, sage, chives, oregano, cracked pepper, etc.)
Begin by mixing warm water, yeast and sugar in the mixing bowl of a stand mixer. The water temperature is very important; too hot and you will kill the yeast, too cool it will not activate properly. Give it a gentle stir and let it sit for five minutes, until the yeast becomes active. It’s active when the yeast begins to look foamy at the surface of the water.
Next add olive oil, four cups of flour and salt. Using a dough hook attachment, mix the dough for five minutes on low speed. Dough will be pretty tacky, that’s ok. Let it rest for five minutes. The resting period is important for the proteins in the flour to completely hydrate.
After the resting period, let the mixer knead the dough for another 5-7 minutes. Focaccia is a very sticky dough, you may add flour another ¼ cup at a time if it seems too wet. The dough should begin to slightly pull away from the edges of the bowl and start climbing up the dough hook. At the end of this mixing period, add herbs, if any. Transfer the dough to a clean, lightly oiled bowl and cover with a damp towel or plastic wrap and let rise for 30 minutes.
The dough should double in size and become less sticky. If this doesn’t appear to be the case, give it a bit longer. If your kitchen is on the cool side, it may take a bit longer. Gently punch the dough down and place it onto a lightly oiled piece of parchment on a baking sheet. Alternately, you may use a well oiled cast iron pan, which is my favorite way to make it at home. Spread out into a thin oval or rectangle, about ½ inch thick. Lightly brush with olive oil and let the dough do it’s final proof for another 30 minutes.
Preheat the oven to 450 degrees F.
The dough should now look airy with some large bubbles on the surface. Brush again with olive oil, and use your middle three fingers on each hand to gently press little indents into the dough, across the entire loaf. At this point I like to sprinkle some extra chopped herbs and sea salt on top, but you may skip this step if you choose.
Place the dough into the preheated oven and bake for approximately 16-20 minutes, rotating half-way through to obtain equal browning on the surface. When the loaf looks a rich golden brown you are ready to remove the bread from the oven. After a few minutes, place the bread on a wire rack to cool.


Leave a Comment